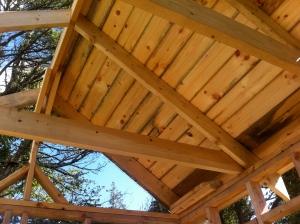
It’s been awhile since I’ve updated you on the greenhouse construction. It’s been a busy and fun summer but the air is changing and there is a rustling dryness in the leaves, spurring me on to finish for the season. It’s been an interesting process – building a greenhouse. It has brought out the curiosity and the willingness of the folks around me to lend their support, interest, and assistance. Since the last posting, the fourth wall, ridge board and rafters have been installed, and the roof boards and windows are in progress.
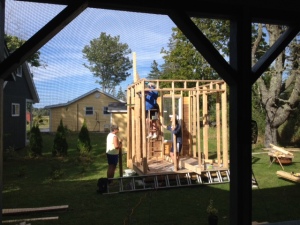 For the fourth wall, I framed for the windows and a door. Double studs around the door should prevent racking from the stresses exerted with repeated opening and closing. I built a lintel at the top of the door opening. I’ll frame in the door as one of the last bits of the construction. I calculated for the door dimensions when framing this wall, and added 1 ½” to the door width to account for two 1” (3/4”) door frame boards and an additional ¼”to accommodate the swing of the door.
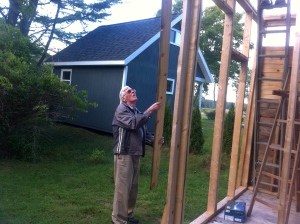
My nephew, Thomas, lifted the wall and I nailed it into place. I spent an hour driving nails to strengthen the walls, tying the walls and joists together more firmly, and stiffening the wall corners.
I constructed the beginnings of the roof by adding a set of top plates and a vertical support for the ridge board at the two gable ends. I added the additional two top plates on the rafter end walls. This tied together the four walls and set me up for working on the roof. Nancy and Brenda helped me with the installation of the top plate assembly.
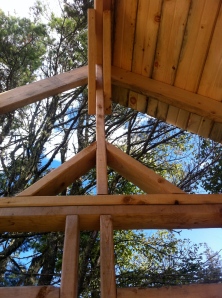 The roof has a run of 49 and 4/8” and a rise of 37 1/8”. The hypotenuse is 61 and 7/8”. (All interior measures.) To create the gable end framing for the roof, I cut the rise 2×4” to 35 7/8” and nailed through from the bottom of the top plates at those ends of the roof prior to lifting these two T-shaped constructions into place. I worked from a ladder to place those T-shaped roof pieces into position and nailed the top plate 2 x 4s” using 3.5” nails. If I’d been a little smarter and experienced, I would have installed the two sets of braces to steady the ridge board while the “T” assembly was on the ground and easier to construct. I’m not great on ladders and enlisted the kind and knowledgeable support of my nephew Thomas. We added 2×4” braces cut at 45 degree angles to stabilize the ridge support uprights. It would have been simpler to have done more of the roof framing on the ground and lifted it into place rather than working from a ladder. Oh well… this is a learning project.
I cut the 2×6” ridge board to 9’6”. This provides me with an 8.5” overhang at each end of the peak.
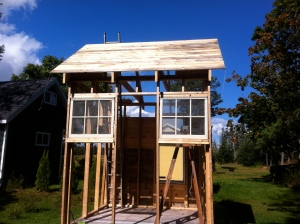 I did not space the rafters 16” on centre as is the usual practice. My cabin, which is 60 years old, has 2×6” rafters spaced 26.5” on centre and it’s a very strong structure. The rafters were cut to match the window spacing on the front wall, 31.5” from the gable ends, and a narrower space between the two central rafters to match the centre window.
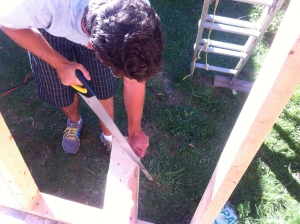 We should have been able to cut the rafters at 60 degrees; however, the angles ended up having to be 54 degrees. We were able to cut all the rafters alike as we tested the first rafter that we cut, successfully in each rafter position against the ridge board.
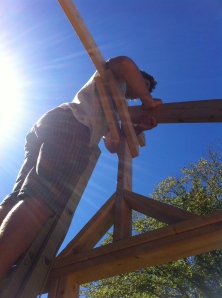 We used 3-3.5” screws to connect each rafter to the ridge board, screwing directly through the ridge board into the rafter for one side of the peak, while toe nailing the corresponding rafter to the ridge board.
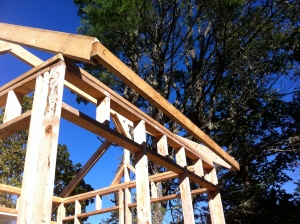 Once we had the two end rafters in place, we created a jig to support the bottom of the remaining rafters as they were maneuvered into place. This saved us a lot of time and aggravation.
I did not cut the rafters to sit into the top plate as is generally recommended. I couldn’t figure the angles. I now suspect that if I’d used outside measures for the 3-4-5 gables, I might have figured it out.
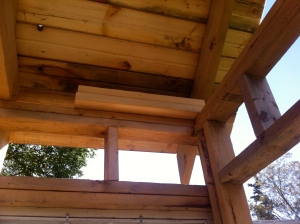 To compensate for this, to add the stability and strength that seating the rafters into the top plate would have created, I used scrap 2 x 6s to reinforce/join more firmly, the rafter ends to the top plates. We used 3.5” galvanized nails for additional strength.
We cut and installed rafter collars for the two interior rafters.
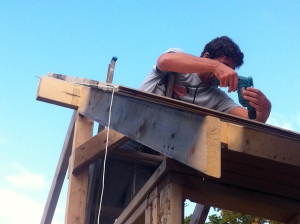
My father and nephew came down to visit and stepped into work mode. They added the roof boards. They used taut pieces of cord tied on a nail at the end of the ridge board and the first lower board of the roof to create a guide for the placement of roof 1×6” tongue and groove. The tongue and groove boards were place on the rafters starting at the bottom of the roof. We used 9’6” boards for the first two rows. We used shorter boards cut to length as I was delivered 12’, 8’, and 6’ pieces of 1×6” spruce for subsequent rows. We added a 9’6” board to keep the growing roof even, edge to edge. The top two boards were also 9’6” boards. The last board at the ridge extended beyond the ridge. We’ll leave that and trim it later when we plank the other side of the roof. Tongue and groove boards were laid with the tongues up, pointing to the ridge. This creates an effective channel for drainage should any moisture infiltrate.
 To work effectively with shorter boards, we assembled rows so that joints on rafters were staggered. This creates more strength in the roof as joints are weak points in any roof. To fill the 9’6”roof width with boards, we measured individual boards by lifting them to the roof and temporarily fitting each in place. The loose board was marked with a pencil for length, returned to the ground for cutting, and then returned to the roof and secured with 1.5” Robertson screws. We used two screws at each meeting of the board with a rafter. My Dad, nephew and I were a “well-oiled” machine of productivity for this process! My dear sister made us supper, supplemented with “Cottage Coffee” – a fitting end to a very productive afternoon of roofing.
The next posting (hopefully within the week) will be about adding the windows and the remainder of the roof! Tempus fugit! Fall Cometh! And I have a few plants I’d like to extend in the Greenhouse!


Wow, Nancy. I did not realize it was such a production. I’m so impressed — and can’t wait to see it with my own two eyes!
I too can’t wait to see it. I would have loved to have been part of this project…any way you can leave one loose screw until I visit and at which point I will finish what you started… 🙂